Sunday, January 30, 2011

Rose bud


Good morning my sweet friends!  We have a fresh powdering of snow on the ground making everything look clean and white.  The kids are going sledding this afternoon on a Boy Scout outing after having a fun sleep-over here last night.  There was lots of music, dancing, computer games, movies ... and a heaping dose of laughter and giggles.  Everyone had a fun and I'm sure today will be filled with more wonderful memories.

Here's another color challenge hosted by Moxie Fab World.  Lovely shades of rose and oh so vintage.  I love it and knew I had to participate as soon as I laid eyes on this trio!  And would you believe that the ladies over at Just Us Girls are calling for hand-made flowers this week?  They are singing my song!


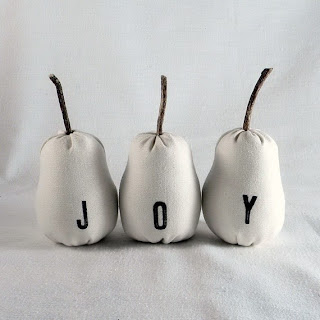
Here is how this post came together for you ... beginning with Very Vanilla cardstock the corners were rounded (Corner Punch) and the edges antiqued with Distressing Essentials.  The patterns are from the gorgeous collection of Springtime Vintage Designer Series Paper.  Just can't get enough of these colors and patterns - as you know I've been using this paper collection a lot lately!  The lace is from my dear sister-in-law - thank you Shirley!  The pin had a crystal teardrop on top so I added a rose colored bead and a pearl.  The seam binding is hand dyed with Crumb Cake and Soft Suede Classic Inks.  I made so much that I had extra for this card after making this too.  JOY!


The chipboard ring was painted first then "glitterfied" with a rose colored chunky glitter.  This Butterfly Punch was used to create my little winged friend and the flower is handmade from scraps of the same papers.  I used a die to cut out four 5-petal flowers, spritzed them lightly with water, then used the end of a marker on a soft pad to curl each petal up.  My hot glue gun (never far from my side) was used to hold them together - nested snug inside one another.  Here's a tutorial that will help.  I brushed the tips with a creme shade of paint and added a green "flower" on the bottom for leaves.


Thank you all for stopping by.  Enjoy your day!


.
Friday, January 28, 2011

Shades of Blue

Hello everyone.  My lack of a mid-week post shows how busy I have been over the past few days.  Goodness, I'm glad it's Friday and there is nothing on the calendar for the weekend.  I think I need a date with my craft room.  I've stolen a little time this week to find some new tutorials and patterns - I can't wait to give them a try!  Let me begin by sharing today's post.  The color combination is from Cath over at Moxie Fab World.  She has some fabulous suggestions posted and I hope to try them all!  Here is the first ...


Pretty, isn't it?  Neutrals with a touch of Marina Mist blue.  I used these colors to create some crafty kits for my good friend Cheryl.  They are full of bits and pieces all inspired by this combination.  I hope she likes them!


My patterned papers are all from the Blueberry Crisp Designer Series Paper collection - as you can see, it's gorgeous.  A doily is added to the front of each pouch as well as a beautiful blue satin ribbon.  I made the flowers from white organza.  The fabric is so slippery, it was a bit hard to sew at first but by the third flower I was getting the hang of it.  Now I'd like a garden of these beauties in every color!  The blue buttons are from both the Regal and the Subtles collections.


The crowns are diecut, distressed, and stamped in a lovely shade of blue with Marina Mist Classic Ink.  She only needs to choose which one to use.  The seam binding is hand dyed and wrinkled to perfection with Marina Mist Classic Ink.  I glittered flowers and hearts with Fine Cosmo Glitter and added a Pearl Jewel to each.

Thank you for stopping by to visit today ... and you get a sneak peek Cheryl!


.
 

Monday, January 24, 2011

Simplicity

 
Hello friends.  Sometimes the simple things are the best ... aren't they?  I tried to keep that in mind when creating my post for you today.  I was hoping to use the precious pink flower created in this tutorial and also wanted to give my flower "center stage" ... so to speak.  So "keep it simple" - I kept saying.  Don't distract from the focal point.  Go light with the embellishments.  With this in mind, I found that Mona's color challenge at CR84FN was the perfect solution.  A beautiful palette of gorgeous colors, trims, and flowers ... and I love the quote too.  Funny how she always seems to have what I "need" at the moment.


I began with Crumb Cake cardstock, brushing the edges lightly with a soft lavender paint.  Then layered on lovely print papers - all from the Lap of Luxury collection.  Perfect for this color challenge and oh so lovely!  A bit of stitching and a rub-on sentiment added further interest to my patterns.  I won't go into details regarding the flower - you can read all about it on my tutorial.  (Thank you for your kind comments ... it made my day to read them!)  Be sure to "click" on the flower image below to enlarge the photo - the shimmer is delightful!


The seam binding is hand-dyed with Crumb Cake and Soft Suede inks.  A length of scalloped lace added texture and a pearl bead was slipped onto my stick pin before placing it in the bow.  Simple ... soft ... sweet.  I hope you like it.


Thank you for stopping by today!


.

Sunday, January 23, 2011

Flower Tutorial

UPDATE:  IF YOU PREFER TO PURCHASE RATHER THAN CREATE .... COMPLETED FLOWERS ARE AVAILABLE IN MY ETSY STORE! THE LINK IS ON THE LEFT SIDEBAR!  ALTHOUGH SHOWN IN VANILLA WITH PEARL OR RHINESTONE CENTERS, OTHER COLORS ARE AVAILABLE IN ANY SU COLOR OF CARDSTOCK!  JUST CONVO ME!

Hello everyone!  I have had a number of requests for a tutorial showing how to make one of my flowers.  You can see this flower on a number of my older posts.  Here, and here, and another one here, in black on this banner, and in color on this card.  There are more examples but as you can see from these, this pattern looks great in any color - even black!  So, let's get started ...

You should use a good quality cardstock.  One that can stand up to water without falling apart.  For my tutorial I used a soft romantic shade called Pink Pirouette.  It's a beautiful color!  You will need three flower punches of different sizes.  I used a Fancy Flower Extra Large, the 5 Petal Punch, and an older small flower punch.  Three flowers of each shape will be required.


Stack your flower shapes from large to small.  Stagger the petals as you go.  Make a hole in the center (I use an upholstery needle) and secure the stack with a brad.


Spritz with water.  This is done at the beginning and during the process of folding the petals.  As you lift each petal you will see that the cardstock beneath is dry.  When that occurs, spritz a little more water on the dry spots.  You don't want your flower drenched but you want the cardstock "pliable".


Onto the petal folding ... lift each petal individually toward the brad.  See how tight I am to the center?  These small petals should be standing nearly straight up.


Spritz again to wet the dry cardstock you just exposed.  Then proceed to fold up each petal of the next three layers.  I turn the flower as I go - only doing one layer at a time and possibly spritzing in between if needed.  Pinch these petals so they are standing straight up .. or close to it.  Making them wrinkled and scrunched is ok - that's what you want!


Finally, the last three layers.  Same as before ... spritz, lift up to a "standing" position, and spritz more as you go.  See how wrinkled this has become?  Perfect!


I thought it best to show you the bottom.  You can see how small it is in relation to the wings on the brad.  That gives you an idea on how wrinkled and scrunched the petals are!


Now, it's simply the whole process in reverse.  Begin to peel back the petals from the wrinkled bundle.  Do one petal at a time and work your way around the flower until you have an entire layer complete before you start the next layer.  Carefully curl the petals tips down (I use my upholstery needle).  Remember, your flower will be damp so be a little gentle.


Now the next layers.  Same process here.  One petal at a time and complete an entire flower before starting on the next layer.  Wrinkled, crinkled, shabby goodness ...


The last three flowers all scrunched up in the center are so sweet.  This is my favorite part.  Just take the tip of your needle (or whatever tool you happen to be using) and push them back to expose the brad inside.  You can leave them tightly closed or open them up fully.  Whatever your heart desires ....


The flower was then spritzed with a glitter spray and allowed to dry.  As a final touch to this lovely pink, I added an elegant center embellishment from Basic Pearl Jewels


Whew - my first tutorial ... I hope it was easy to understand.  Thanks for stopping by - I'll be back later with more to share!  (Perhaps I'll find a home for my pretty little pink flower.)


.

Saturday, January 22, 2011

Winter white rose ...

 
Hello friends!  It's a blustery cold day here ... temps are hovering around 10 degrees.  Just looking out the window makes me put on an extra sweater.  I'm enjoying my afternoon with the newest edition of Somerset Life.  I kow you love it as much as I do.  I have past publications piled next me ... waiting their turn.

I didn't have to go far for inspiration ... I only had to stop in for a visit at my favorite challenge blogs.  The City Crafter challenge is coming to a close.  I am so enchanted by the beautiful hand-made flowers I see there ... I want each and every one of them!  My favorite flower to make is on today's post.  I just love how it turns out every time.  Beautiful in shades of white and glorious in colors too.  The ladies at Colour Q put forth this beautiful dinnerware.  Isn't it gorgeous?!


Here is my post for today.  The base is Always Artichoke cardstock layered with a So Saffron polka-dot print from the Sunny Garden collection and a bright flower pattern from the Greenhouse Gala collection.  My ribbon is a Poppy Parade stitched poly with a sweet white button and tag sentiment.


I painted my chipboard and added a large circle of a Cherry Cobbler print.  I never intended the colors to match so closely!  It needed some sparkle so I "glitterfied" it with Mod Podge and a bit of Chunky Essentials Glitter.  The leaves were cut from a dark green burlap-like fabric ... a perfect match to Always Artichoke.  And the final touch was creating the cardstock flower with three different flower shaped punches.  This is my favorite flower - it's so easy too!  When done, I misted the flower with glitter to make it shimmer.  (You may have to enlarge the photo to view that.)  This one got a Rhinestone Jewel center too.  See it nestled down in the petals?  Sigh.


I mentioned my love of gardening in previous posts.  You were so kind to ask for photo's.  So please indulge me while I share some more hand-made flowers with you.  These are from my garden ... hand-made by God.


I appreciate you stopping by today.  I hope you found some inspiration in today's post.  Stay warm my friends!

Update - Here's a link to my tutorial showing you how to create this beautiful flower ... enjoy!


.


Wednesday, January 19, 2011

Wishing you peace ...

  
Hello everyone!  The homework is done, studies prepared for tomorrow, my husband watching a movie, and me with time to myself.  Simplicity was key tonight.  I wanted to hide away and create - but not tax myself doing so.  It's been a tiring day, we all have them don't we?  Nothing too difficult tonight ... no, not for me ... simple and relaxing was what I needed.

Mona and her Design Team presented a wonderful challenge this week - you know they always do.  This one is so perfect for Valentines.  I turned it into Christmas as you will see ... but again, I kept it simple.  You can visit their gorgeous samples at CR84FN.  And Kirsty at The City Crafter has asked for handmade flowers in her challenge and I couldn't be happier.  You can be sure that I will be a repeat visitor this week ... I can't wait to see what everyone creates - you see, I have a soft spot for handmade flowers and am always searching for new tutorials.  Thank you, ladies, for the inspiration!


Here is what I have to share with you today, my friends.  The card base is Crumb Cake cardstock layered with Soft Suede cardstock.  The polka-dot paper is from the Jolly Holiday collection and the holly print paper is a retired pattern dug out from my scrap drawer.  Together I thought they were perfect by capturing the colors of Mona's challenge.  I guess the holly is where my Christmas theme evolved.  The Crumb Cake buttons are part of two collections - Designer Neutrals and Springtime Vintage.  I added some red hemp to "dress them up" a bit.  The greeting is stamped in Cherry Cobbler Classic Ink and is from A Wish for Peace stamp set.  Antiqued around the edges with Distressing Essentials .. it was then ready for my card.


The seam binding is hand-dyed with Crumb Cake and Soft Suede Classic Ink Refills.  Crinkled, wrinkled and dried to perfection.  The flower I crocheted with a 3-ounce red yarn I had laying around.  I think it's cute ... not exactly a poinsetta but a bright and cheery Christmas red none the less.  Corduroy buttons and brads are found here and one added to the flower center with a decorative star rising up from behind. 


Thank you all for stopping by.  I hope you find inspiration today and time to create too.

.

Monday, January 17, 2011

Thankful ...

 
It's wonderful to have a day off.  I have so much planned - a visit to the bookstore (the new Somerset Life is out and I can't wait to get one), sewing a chair cushion with my daughter, and then of course there is the ever needed ... grocery shopping.  Ah well, I can't complain - I will be spending the day with my children and I wouldn't want it any other way!

Ros has given us a sketch challenge this week over at The City Crafter Challenge Blog.  At the risk of repeating myself (and I know I am) ... sweet and simple is the best kind of sketch.  Thanks Ros!  The Design Team has created some beautiful samples to share with you - they are so talented.


My project began with Very Vanilla cardstock layered with Designer Series Papers from the Springtime Vintage collection.  My goodness, I am using this a lot lately - I hope you're not growing tired of it!  Hand-dyed seam binding and some delicate lace added dimension and texture plus helped to soften the contrasting patterns.  I also added a touch of paint in a light shade of pink around the edges ... forgive me - I have to practice that technique.  (You are all so patient with me as I dabble in "this and that" along the way.)  My "tag" is a beautiful example of ephemera ... I've been collecting all that I can get my hands on.


The sweet creme flower and decorative pin compliment the strong color of the Rose Red button from Subtles Button Collection.  My sentiment is stamped in Rose Red Classic Ink and held in place by a button of the same color.


It was so nice of you to stop by!

.

Sunday, January 16, 2011

Vintage blue

 
The kids are sledding and I'm sure they are having loads of fun.  We'll light a fire when they get home and warm them up with cups of hot cocoa.  Remember the days when your toes would defrost in front of the fire ... they were soooo cold that you could feel them tingle?  Mom would make hot cocoa with milk ... in  a pan ... with REAL cocoa.  She couldn't stop stirring or the milk would burn.  Goodness, I miss those days and hope my two young ones will look back with the same fondness.

The Play Date Cafe color challenge this week is stunning.  What would I do without these ladies?  Their ability to find the perfect inspirational photo's, assemble them into a pleasing palette, and then provide a variety of beautiful projects.  I am so thankful for this very talented team!  (They make us all look good - don't they?)


I started with Very Vanilla cardstock and layered on delicious patterns from the Springtime Vintage collection.  The doily is die cut and sponged with Crumb Cake Classic Ink to give it an aged look.  The seam binding was hand-dyed (lightly) with Baja Breeze Classic Ink and the tea-stained tag is stamped with Basic Grey Classic Ink.


I've seen so many gorgeous examples of lace flowers lately that I thought I'd give it a try and create one myself.  So I dug through my scraps and came up with about 9 inches of a lovely lace scallop and some tulle.  Holding them together, I created a running stitch down one edge - gathering the trims as I went.  The ends of my cotton embroidery thread were tied together (forming a tight circle) and I "adjusted" the ruffles.  With a Baja Breeze embellishment in the center from Vintage Flower Adornments, I am very pleased with the result.  (I hope you like it too.)  A velvet leaf tucked behind the bow added a bit more texture to the soft romantic feel of my card.


Stay warm, my friends and thank you for stopping by!

.

Wednesday, January 12, 2011

Shades of Spring

 
Hello again, friends.  We have a few new inches of snow here today.  Everything is so clean and white.  It's beautiful outside and oh so cozy inside.  I think I'll put my feet up later and crochet a while ... bliss.

Mona's challenge over at CR84FN Color Challenge this week is another beauty.  Shades of spring is what I see ... soft and subtle.  And Rembrandt's quote is so very true - isn't it?  Thanks for sharing, Mona.


My project started with Whisper White cardstock - layered with scraps that coordinated with the challenge palette ... the softness of yellow and shades of green.  If you ever see my garden (perhaps I should post a few photos) - you will see those colors everywhere.  I even dyed some seam binding with Certainly Celery Ink to add yet another glorious green.  All the images are stamped with Basic Grey Classic Ink.  My sentiment came from Sincere Salutations.  The postage mark and script is from a retired set.  That sweet little bee (love him) can be found in Nature Walk.  You've seen other stamps from this same set used here and here and yes ... here too.  I admit  - I am smitten.  And finally, the wonderful image of the Eiffel tower is from the Artistic Etchings stamp set.


The lavender heart is crocheted and an aqua button embellishment tied on with string.  And my green/lavender velvet leaf found the perfect place to be - tucked in securely behind the bow.


Thanks so much for visiting with me.  I hope you enjoyed your stay.

.

Sunday, January 9, 2011

Spring is calling ...

 
I was very busy today and am so glad that I am able to share a second post with you.  While laundry and cleaning were on my "to do list" ... I was able to sneak away to my craft room for just a bit.  Green is my FAVORITE color and I just had to participate in this weeks color challenge over at The Play Date Cafe.  Just look at this photo ... isn't it wonderful!?  The color is serene ... the water refreshing - I can hear it, can't you?  Tell me it's the sound of snow and ice melting.  With everything frozen here, this waterfall photo is a welcome sight and has me wishing for Spring.  I know it's coming ...


Over at Etsy Inspired they are celebrating the French country vintage and handmade home decor of La Pomme.  Such beautiful things to see there.  Ephemera, tins, sheet music, and these fabulous fruits that became part of my inspiration today ....


So I began with Very Vanilla cardstock as my base and layered on delicious papers from our Botanical Gazette DSP collection.  I am absolutely deeply in love with these papers.  Every sheet is gorgeous.  A delicate white lace is held in place by various sized buttons in shades of green.  Since the inspiration photo calls for gold, I added a piece of left-over mesh along the bottom - perfect for my little bird to rest.


An old piece of wide twill was used for ribbon.  I added a pearl and a silver bead to a green decorative pin.  My sentiment is stamped in Always Artichoke Classic Ink and cut out with the Jewelry Tag Punch.  It's small, sweet, and just the right size for little words of happiness.

My bird is obviously not a "Michigan-der".  I am not aware of any feathered friends this shade of green in Michigan.  Perhaps he's here visiting from down south?  I stamped him in Jet Black StazOn and colored him with various Classic Ink pads.  Since the Classic Inks are water based and the StazOn is not, I was able to use an Aquapainter and it worked beautifully ... allowing me to blend and shade.  I should tell you I used a watercolor paper to be sure I could apply water without damaging the paper itself.  This little friend of mine is from the Nature Walk stamp set and I have been using these images a lot lately ... but I guess I don't have to tell you that.  Sylvia has a gorgeous vintage card on her site that also uses this sweet set.  Be sure to leave her a comment when you stop by!


Again, thank you for all your kind comments.  I enjoy reading every one - your words mean so much.  Have a wonderful evening!

.

Pom-Pom's?

 
Good morning friends.  It's a cold "single digit" morning here ... which makes the house feel so cozy.  I love early morning.  The family is still asleep so I have some quiet time to share with you.

The challenge sketch from Get Sketchy is fabulous!  I've commented before on the joy of a simple sketch ... it gives direction without constraining your creativity - this one is another perfect example.  The color combination comes from the ladies at ColourQ - they never disappoint and once again have provided a beauty to inspire us.


My project began simply but finished with more layers and details than I expected!  A Whisper White card layered with a beautiful blue print from Springtme Vintage Designer Series Paper was a good beginning.  I added a So Saffron polka dot (it seems to be my "go to" background lately).  Basic Black Classic Ink created my birdcage from Nature Walk.  I also used Artistic Etchings and Style Beautiful stamp sets.


The layers of lace, a blue stiped print and Daffodil Delight Pom-Pom Trim did not go as I had intended.  To stay true to the inspiration colors (I was missing Daffodil Delight), the pom-pom's were added - my first time working with this type of trim.  Hence, the "layers of detail" ... that's all I'll say about that (thanks for your understanding).  How about some guidance - do you sew them on, glue them or tape?

I dyed some seam binding and wrinkled it to perfection.  An old fabric flower layered with a crocheted Fleurettes II detail and a Pearl Jewel tops my bow.


I have a lot to learn about working with pom-pom trims.  I'm sure you'll see more of them in the future - but only after I have them "under control" - so to speak.  Have a wonderful day ... I hope to be back with a second post later!


.

Friday, January 7, 2011

Spun Sugar

 
I've been away too long and have missed this little blog of mine.  Returning to our daily routine has kept me very busy this week. I couldn't wait to create something to share with you. The gorgeous color combination presented on Mona's new blog (CR84FN Color Challenge) has been on my mind all week. The shades are so soft and sweet ... they look like "spun sugar" to me. Delicious.


I began with Pretty in Pink cardstock as my card base. Layered with a yellow polka dot print and a beautiful stripe from the new Springtime Vintage Designer Series Papers collection my card began to pull the inspiration colors together. The flourish plate from Notably Ornate stamped with Pretty in Pink Classic Ink fit perfectly. My message of love is from the tres' chic Artistic Etchings set.


I made the shimmery flower and crocheted the heart for this project.  Tutorials and instructional links are found in previous postings.  Various other embellishments such as buttons, a wispy fabric and netting, half-pearls, dyed wrinkled seam binding and a decorative pin added texture while keeping to the recommended color palette.


I know this is a short post this evening. If I don't hurry, I may be the last participant in Mona's challenge!  I'll be back later with more to show. I have so many new things to share with you. Thanks for visiting - I'm so glad you could stop by.


.